Table of Contents
Introduction: What Makes a Dip Truly Irresistible?
Have you ever wondered what makes a dip so addictive that it disappears within minutes at any gathering? Whether it’s game night, a holiday party, or just a cozy evening at home, the secret lies in crafting something creamy, cheesy, and packed with flavor. Enter Texas Trash Dip —a warm, gooey, Tex-Mex-inspired masterpiece that’s as easy to make as it is delicious. If you’ve never tried this crowd-pleaser, now’s your chance to master it. Let’s dive into how you can perfect your Texas Trash Dip for any occasion!
Overview: Why This Recipe Stands Out

What makes Texas Trash Dip special isn’t just its bold flavors—it’s also incredibly simple to prepare. With only about 15 minutes of prep time and 20 minutes in the oven, this dish is perfect for busy hosts who still want to impress their guests. Plus, its difficulty level is beginner-friendly, making it ideal for cooks of all skill levels.
The combination of creamy refried beans, tangy sour cream, rich cream cheese, and melty cheese creates layers of texture and taste that are hard to resist. And the best part? You can customize it endlessly to suit your preferences or dietary needs.
Essential Ingredients: The Building Blocks of Flavor
To create the ultimate Texas Trash Dip , you’ll need these key ingredients:
- Cream Cheese (8 oz)
- Acts as the creamy base of the dip.
- Substitution: Use dairy-free cream cheese for a vegan version.
- Sour Cream (1 cup)
- Adds a tangy kick and balances the richness of the other ingredients.
- Alternative: Greek yogurt works as a healthier swap.
- Refried Beans (16 oz)
- Provides a hearty, savory foundation.
- Swap: Black beans or pinto beans for variety.
- Taco Seasoning (1 packet or homemade blend)
- Infuses the dip with authentic Tex-Mex spices.
- Tip: Make your own seasoning mix using chili powder, cumin, garlic powder, and paprika.
- Chopped Green Chiles (4.5 oz)
- Adds a mild heat and brightens the flavor profile.
- Optional: Add jalapeños for extra spice lovers.
- Shredded Cheese (2 cups)
- Melts beautifully on top for that ooey-gooey finish.
- Recommendation: A mix of cheddar and Monterey Jack works wonders.
- Optional Toppings
- Diced tomatoes, green onions, cilantro, olives, or avocado slices add freshness and color.
Each ingredient plays a crucial role in creating harmony between textures and flavors. Don’t be afraid to experiment with substitutions if you’re catering to specific diets or tastes.
Step-by-Step Instructions: From Prep to Perfection

Here’s how to whip up your Texas Trash Dip like a pro:
- Preheat Your Oven
Set your oven to 350°F (175°C). Grease a 9×13-inch baking dish with cooking spray or butter. - Mix the Base
In a large mixing bowl, combine softened cream cheese, sour cream, refried beans, taco seasoning, and chopped green chiles. Use a hand mixer or whisk until smooth and well-blended. - Spread Evenly
Transfer the mixture into your prepared baking dish, spreading it out evenly with a spatula. - Add the Cheesy Layer
Sprinkle shredded cheese generously over the top, ensuring an even layer for maximum meltiness. - Bake Until Golden
Pop the dish into the oven and bake for 20–25 minutes, or until the edges are bubbly and the cheese is golden brown. - Garnish and Serve
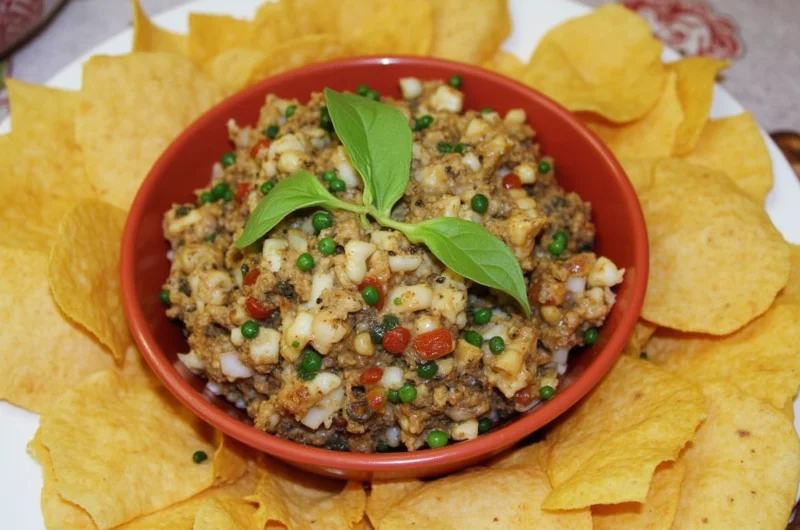
Once done, let the dip cool slightly before adding toppings like diced tomatoes, green onions, or cilantro. Serve warm with tortilla chips or crackers.
Pro Tip: For an extra-smooth consistency, soften your cream cheese in the microwave for 20 seconds before mixing.
Assembly: Layering for Success
Building your Texas Trash Dip is where creativity shines! Here’s how to assemble it for maximum impact:
- Start with the bean-and-cheese base as your sturdy foundation.
- Spread the mixture evenly to avoid uneven heating during baking.
- Top with shredded cheese, pressing it gently into the surface for better adhesion.
- After baking, garnish with colorful toppings for visual appeal.
Presentation matters! Arrange your chips around the dish or serve them in a separate basket for easy dipping.
Storage and Make-Ahead Tips: Keep It Fresh
One of the perks of Texas Trash Dip is its versatility when it comes to storage and reheating:
- Refrigeration: Store leftovers in an airtight container for up to 3 days. Reheat individual portions in the microwave or reheat the entire batch in the oven at 350°F until warmed through.
- Freezing: Assemble the dip without baking, cover tightly with foil, and freeze for up to 3 months. Thaw overnight in the fridge before baking.
- Make-Ahead Option: Prepare the base mixture a day in advance and refrigerate. Assemble and bake just before serving for optimal freshness.
Recipe Variations: Get Creative!
Why stick to the basics when you can elevate your Texas Trash Dip ? Try these fun twists:
- Spicy Kick: Add diced jalapeños or a dash of hot sauce to the base mixture.
- Meat Lovers: Stir in cooked ground beef, shredded chicken, or crumbled bacon.
- Vegan Version: Swap dairy-based ingredients with plant-based alternatives like cashew cream and vegan cheese.
- Low-Carb Option: Serve with veggie sticks instead of chips for a guilt-free treat.
The possibilities are endless—don’t hesitate to experiment!
Conclusion: Dive Into Deliciousness
There’s no denying that Texas Trash Dip is a showstopper. With its creamy texture, bold flavors, and endless customization options, it’s sure to become a staple at your gatherings. So grab your ingredients, follow these steps, and get ready to wow your friends and family. Remember, cooking is all about having fun and making memories—so dig in and enjoy every bite!
FAQs: Everything You Need to Know About Texas Trash Dip
- Can I make this dip ahead of time?
Absolutely! You can prep the base mixture a day in advance or freeze the unbaked dip for future use. - Is Texas Trash Dip healthy?
While indulgent, you can lighten it up by using low-fat cream cheese, Greek yogurt, and reduced-fat cheese. Adding veggies as dippers boosts nutrition too. - How long does it last in the fridge?
Properly stored, it stays fresh for up to 3 days. Always reheat thoroughly before serving. - Can I double the recipe?
Yes! Simply adjust quantities accordingly and use a larger baking dish. - What occasions is this dip best for?
Game nights, potlucks, holidays—you name it! Its versatility makes it perfect for any event.
Now that you’re armed with all the tips and tricks, go ahead and give Texas Trash Dip a try. Trust us, once you do, there’s no turning back!